BitDepth 747 - September 07
06/09/10 22:01 Filed in: BitDepth - September 2010
How I organise and work with large data sets of digital images,
The digital photographer’s workflow
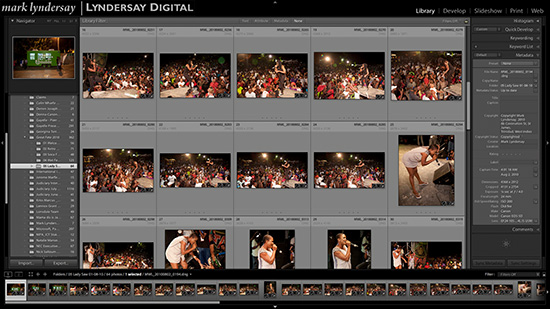
Adobe Photoshop Lightroom 3 adds more features to the popular image editor and organiser.
Photographers have always had a workflow, they just didn’t call it that when we used film. You mixed chemicals, maintained them at a specific temperature, monitored them for expiration and replenished as you went along.
Everything took a specific amount of time, whether it was Tri-X pushed in a concentrated solution of HC110 or Fujichrome 50 pull-processed to hold its vivid tone, there was a science to working with film that was part of the magic of being responsible for your images from the moment you clicked the shutter to the final presentation of the photo.
If there was any true snobbery to photography in the last glory decade of film, it was the gulf between photographers who shot colour negatives and used one-hour labs for prints and those who took their work all the way through the darkroom process.
Being a photographic snob is a bit harder these days. It’s quite likely that an amateur will have better equipment than most professionals do, because they aren’t buying tools that have to make business sense. But some of the old rules still apply. A Nikon D3x that’s set to shoot JPEGs is, digital purists would insist, just a $40,000 one-hour lab you can hold in your hands.
This column offers one approach to an often dizzying collection of software options for managing your files.
Capture. My preference for capture files is RAW, the direct dump of the image from the camera’s sensor. I normally have the camera set to neutral, bypassing any internal camera settings normally used to ‘flavour’ your photos when you press the shutter. RAW files are large, up to five times as large as equivalent JPEGs, so expect to radically increase your storage, both in camera and on computer.
The file formats are widely varied however, and current best practice suggests that converting native RAW files to the more universal DNG format will preserve the digital negative qualities of today’s RAW files while making it more likely that they can be opened by software in the future.
For photographers used to working with negative masters, RAW files are the closest that digital comes to the rich potential of material direct from a film based camera.
Transfer. Use the fastest connection available to you to transfer from card to computer. I use Firewire 800 and USB 2, but e-SATA direct card readers work well too. On transfer, consider creating a folder for your images that will guide your future organisation. I title folders by subject and add an abbreviated date to each one.
Ingest. Pictures in a folder aren’t terribly useful. At this point, you need to turn to one of the many options for organising and adding information to your files.
Every digital camera comes with software for just this purpose, but there are even better solutions available that will work with files from any camera manufacturer. I’m currently using Adobe’s Lightroom, but some users swear by Apple’s Aperture and Phase One’s Capture Pro. As a group, these software solutions have come to be known as parametric image editors and they allow users to work with multiple files at once and to apply corrections that don’t actually alter the master files until they are exported to the desired format.
In addition to colour and tone corrections, this is where file metadata identifying the image creator as well as adding image description information.
Serious photographers, both professional and amateur who work with large image collections, will find that a surprising amount of the critical work involved in managing, colour correcting, toning and identifying images can now be done in time saving batches using a parametric image editor with final polishes done in Adobe Photoshop.
Much of my current workflow was inspired by the highly recommended procedures outlined in The DAM Book, by Peter Krogh, now in its second edition. You may also wish to review the recommendations of the UPDIG group and dpBestflow.
I’m still to fully implement his process with catalogs, which allow access to searchable thumbnails and file metadata in offline media, but that part of the process is getting closer. Expression Media , formerly a Microsoft product and before that, created by startup by iView, is now with Phase One and is likely to be actively developed. Extensis Portfolio isn’t anywhere near as good at handling file thumbnails in today’s RAW files and feels clunky compared to Expression Media. That remains a process to be more fully explored in the future.
The other element in my special workflow sauce is Camerabit’s PhotoMechanic, an admirably single purposed bit of software designed to preview images quickly and embed file metadata efficiently.
There is, quite simply, no better product for reading the embedded preview in a RAW file for clients in a hurry to review a shoot or to do a quick preliminary edit on a big take. Does the cost of PhotoMechanic make sense for the average user? No. But if you’re regularly ingesting two or three hundred images or more in a typical session, you won’t regret investing in this product.
Related...
BitDepth 750 - This Photographer's Way
BitDepth 749 - The Copyright Condom
BitDepth 748 - Professionals versus Amateurs
BitDepth 746 - An ode to good glass
BitDepth 745 - Your new digital camera
blog comments powered by Disqus