BitDepth 628 - May 20
19/05/08 19:41 Filed in: BitDepth - May 2008
Scanning film can be a chore, but with the right scanner and settings, you can move photographs from one medium to another.
Scanning for fun and profit
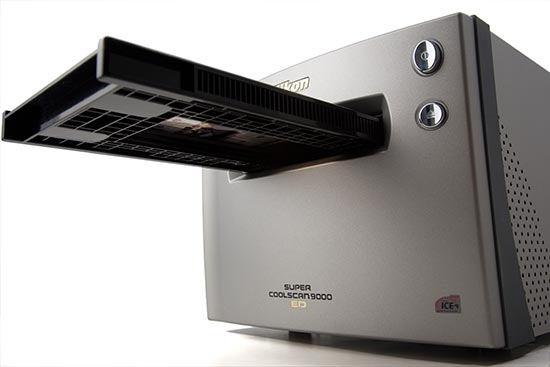
Nikon's 9000 ED Scanner is a massive hunk of technology roughly the size of small microwave, but a drum scanner, the next best device for scanning film costs far more. Photo by Mark Lyndersay.
There was a book knocking around at the turn of the century called "Start with a scan" that hopeful photo buffs bought hoping to be able to turn their old negatives and prints into digital files on their computers.
Seeing it, I thought about how many of my images actually started with a bucket of chemicals, noxious potions that seemed capable of staining black plastic.
Developing and printing your own work was a difficult thing to do; a process composed of so many steps that it made baking look like a flippant lark.
Today, it starts with a digital camera, a computer with a lens attached that is programmed so cleverly that it's almost impossible to take a bad photo unless you attempt to take control of it.
Most of today's digital photographers are comfortable with the preprocessed JPEG files from their digital cameras and most folks planning to scan a photo will slap a favourite print on the bed of a cheap scanner and end up with an acceptable representation of the image.
But photography has always embraced both happy snappers and image obsessives. The image maker who lugged a medium format camera around on assignment is unlikely to be satisfied with a scan from a postcard print on a low-end scanner.
Last call for film
For serious photographers with a commitment to film that goes back decades, these are the end times not just for the darkroom, but for dedicated film scanners as well now that demand has begun to steadily taper off.
One sure indicator of this is the shakiness of scanner drivers in recent system upgrades on the Mac and PC. Some scanner software still won't work in Mac OS 10.5 and Windows Vista, a warning sign that vendors are seeing diminishing returns on their software support development.
Desktop film scanners sit between the feeble film adapters grafted on to more sophisticated flatbed scanners and high-end drum scanners. The first one I ever used was installed at the Guardian in 1990. Nikon's LS3500 was a squat, toad-like beast that cost just a hair less than US$10,000 and scanned a 75MB file from transparencies and negatives.
The device had cranky film holders, was agonisingly slow and produced far better scans from negatives than transparencies. That bias led to the switch at the paper from shooting colour positives to colour negatives during my time in the photographic department.
Eighteen years later, you can get a whole lot more from a film scanner for a whole lot less, and Nikon remains the go-to company for devices that scan directly from film.
Original to digital original
Scanning a colour print is ridiculously easy, with some flatbed scanners offering one touch controls that automate the whole procedure, so why would you want to go through the considerable hassle of using a film scanner?
One word. Quality.
A print is always an interpretation of the information on a negative, but going back to the master image, and capturing the data directly from it is as close to the grail as analog to digital transfer gets for the serious photographer.
I use a Nikon Coolscan V that designed for 35mm film and a Canon flatbed that doubles up for scanning film. Small format film scans on the Canon are poor to middling, about average for a flatbed with an adapter, and the medium and large format film scans are fair to good.
Over the last two weeks, I've been working with a borrowed Nikon 9000 to scan some medium format negatives and transparencies and the difference is astonishing. A full resolution scan from a 6cm x 6cm transparency in standard mode inches into the computer in at a whopping 230MB.
When I zoom in on images that looked just fine years ago the ruthlessness of the digital capture reveals flaws I couldn't possibly have seen without blowing up the image to the size of a wall.
There are no illusions about what I'm engaged in now. These scans will be my new digital negatives for these images, and I don't plan to do this twice. The project has demanded storage upgrades, a dedicated computer for scanning and will take months to complete.
This isn't an undertaking for everyone, but if you have a serious investment in images, you'll want to convert them to digital files by going back to the source, where the emulsion hits the plastic.
Emulsion to bits - a tipsheet.
Nikon's scanners incorporate a useful feature called Digital Ice, which does a remarkable job of removing small scratches and dirt on colour originals. It doesn't work with black and white film though, so you'll still need to have good film cleaners around to save time retouching in Photoshop later on. I like Pec-12, a special purpose film emulsion cleaner, just be sure to use it with clean cotton wipes.
Don't skimp on the scans, storage is cheap these days and a high quality scan can take anywhere from several minutes to a quarter of an hour, so scan in high-bit mode, capturing 16 (or 14, depending on the scanner) bits per channel. This will double your scan size and require you to save the files in TIFF or PSD format.
Don't try to get the scan perfect in preview mode. Many scanners offer poor previews so keep corrects broad and save the finessing for Photoshop. Never try to sharpen scans using scanning software.
blog comments powered by Disqus